The Project Management App for Contractors

Quick Tutorial

Main Screen

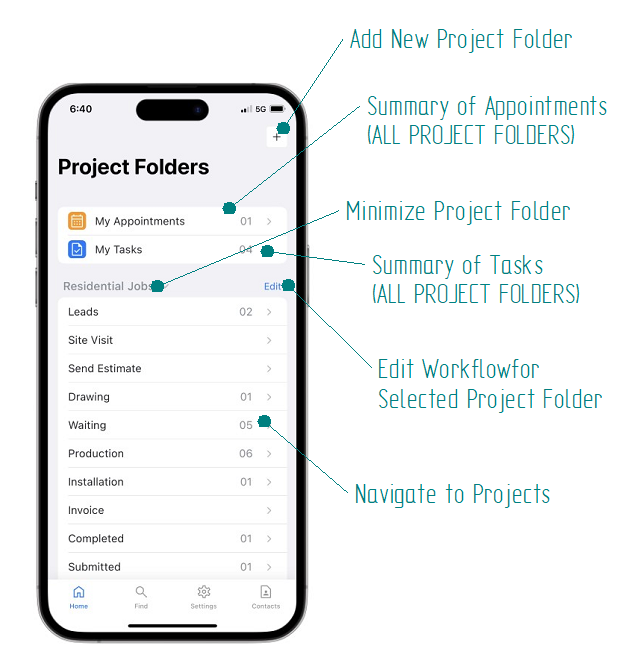
The main screen provides an overview of all the projects. At the top there is a summary of outstanding tasks and appointments. Tapping on the row will bring up a list of items. The items use color coding based on due date. Blue= Upcoming, Green=Due Today, Orange=One day late, Red= Late.

Creating New Project Folder

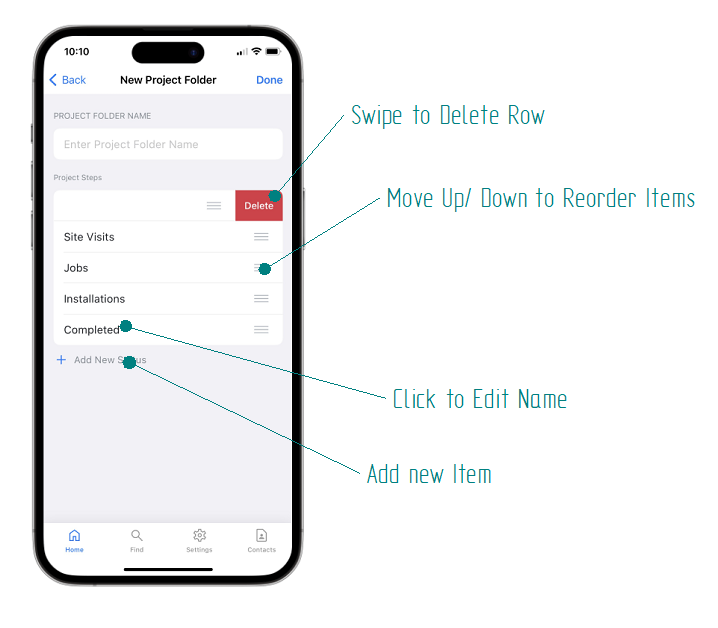
When first launching the App, you will need to create your first project folder. These folders are used to separate your projects into useful categories. Below you will find some examples of folder structures, but ultimately it will be based on your business requirements. Folders that are no longer needed or complete can be Hidden. This feature is found in the "Edit" folder screen.

After creating a folder, you will need to setup your workflows. A workflow is a sequence of steps you take to complete your project. By default, the workflows will be populated from a template. This template is found in the settings page of the app, which you can customize if needed.

The workflows can be edited at anytime, and each project folder can have a unique workflow. This allows different project groups to be managed using unique workflows.

Examples of Project Folder Structure

Project Based

Building 1
- Unit 1
- Unit 2
- Unit 3

Building 2
-Unit 1
-Unit 2

Location Based

  Branch 1
- Project 1
- Project 2
- Project 2

  Branch 2
- Project 1
- Project 2

CategoryBased

Schools
- Project 1
- Project 2
- Project 3

Restaurants
- Project 1
- Project 2

Client Based

Apple
- Project 1
- Project 2
- Project 3

Google
- Project 1
- Project 2
Contacts

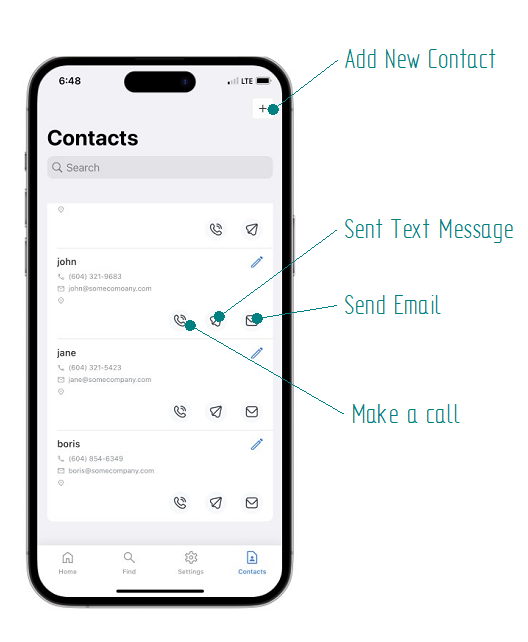
The App allows you to manage a list of contacts. Contacts are optional for creating projects, but you may wish to setup contacts for repeat clients. This will allow you to search jobs for specific clients. The contact page offers useful shortcuts which allow you to call, message or email the contact from the app. You can also add notes to the contact by clicking on the row.

Project List View

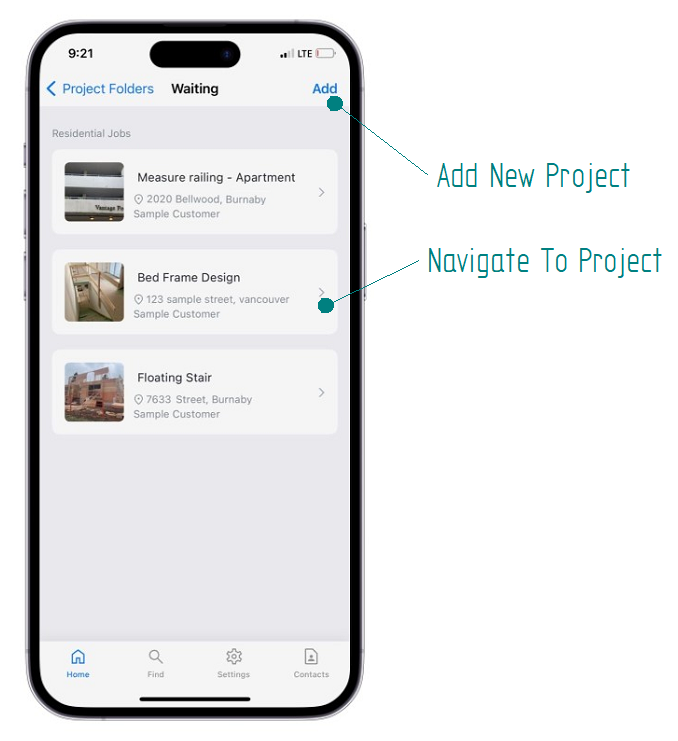
Tapping on the workflow will bring up a list of projects. From this list you can create new projects.

Project Details Page

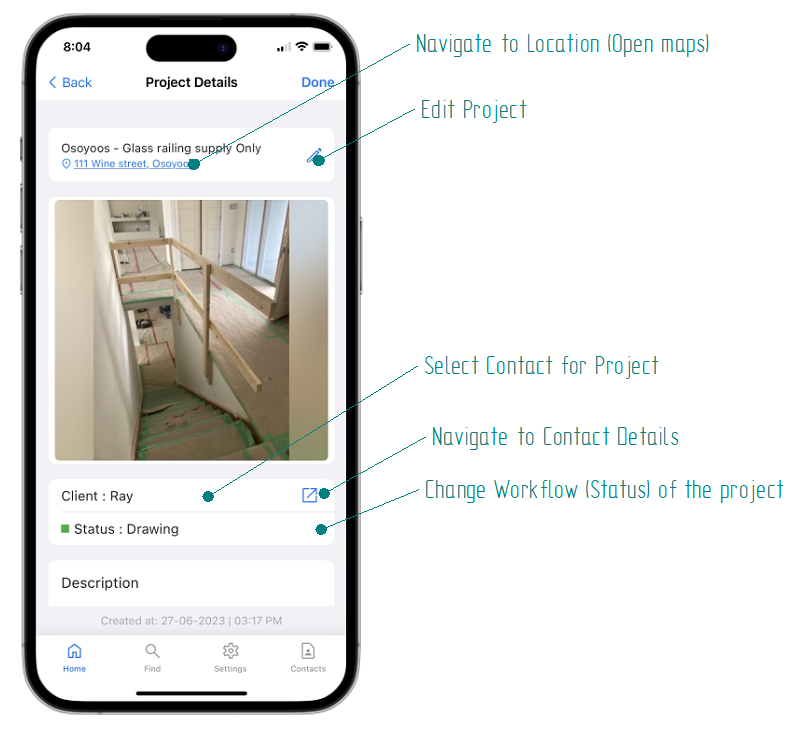
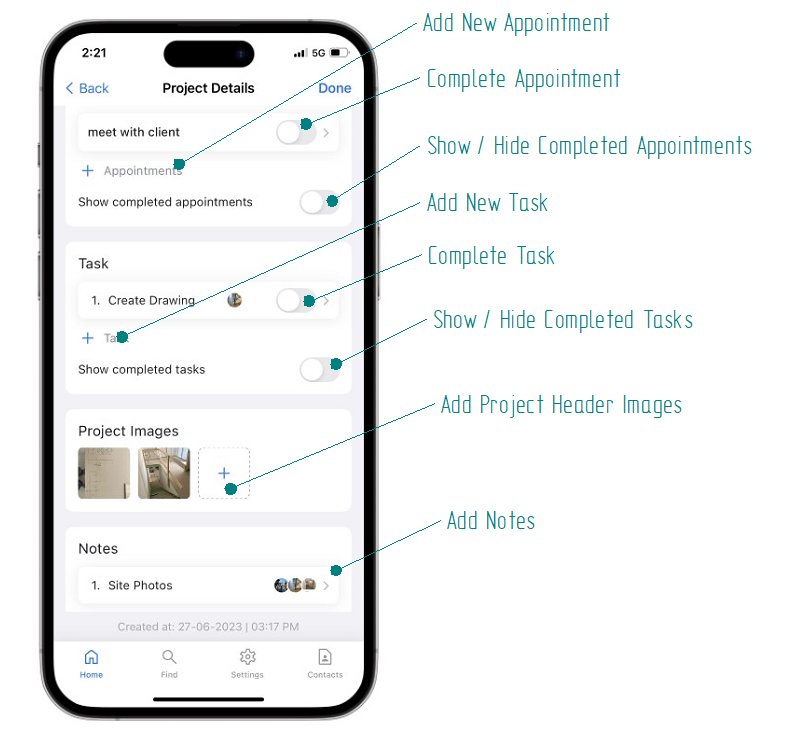
Tapping on the project row will bring up the project details page. At the top of the page you can select a contact for the project, change the status of the project and also Navigate to the job site using the Address link. 

At the bottom of the page, you can add useful item to the project such as Tasks, appointments and notes.

Tasks and notes can be used for Storing Photo's. It is suggested to put action items such as deficiencies into tasks, and reference Photos in notes.  Completed Tasks and Appointments will be hidden by default. You can show the finished items by toggling the view switch. 

Notes and Tasks have an email feature, so you can send these items as email attachments. 

The project page will also allow you to take Photo's. This is used to add reference photos to your project so they are easy to identify. By default the first photo will be used as a Header image. 

Image View

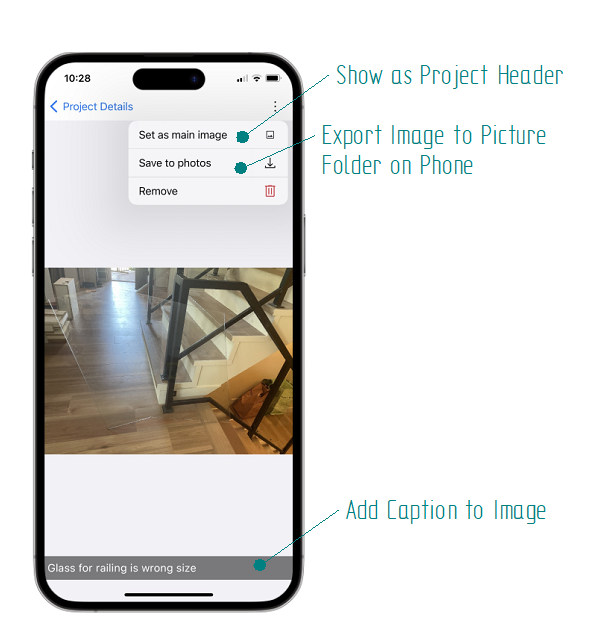
Tapping on the image in the slider will bring the full image view. Here you can add a caption for the image. In the settings you can also select which image you want to use as a heading image, and also export the image to your photo's folder if you need to use the image outside the app.

Camera Feature

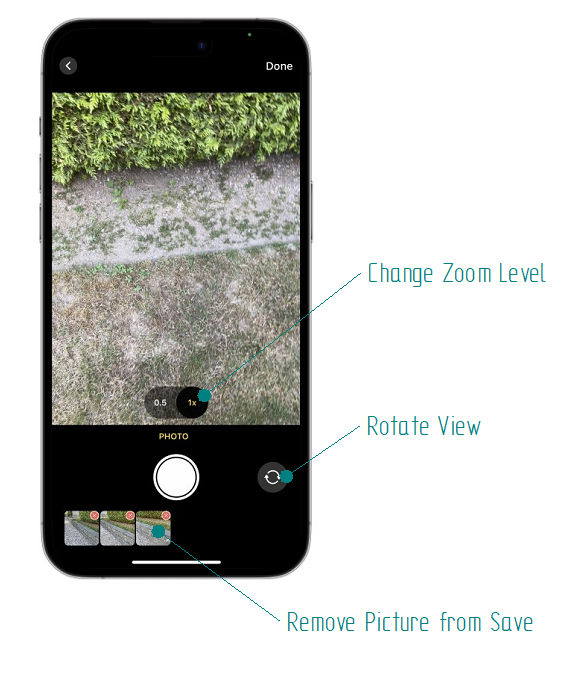
SiteNote is designed to make it easy to document job sites. The Camera feature uses Continuous shooting mode to allow you to walk around the job site snapping pictures. The taken pictures are shown on a slider at the bottom of the page. You can delete the images you do not want to use by clicking on the X.

The camera feature will also allow you to fix zoom level and camera rotation.

When finished, all the taken images will be loaded into the project.  

Made with Pingendo Free  Pingendo logo